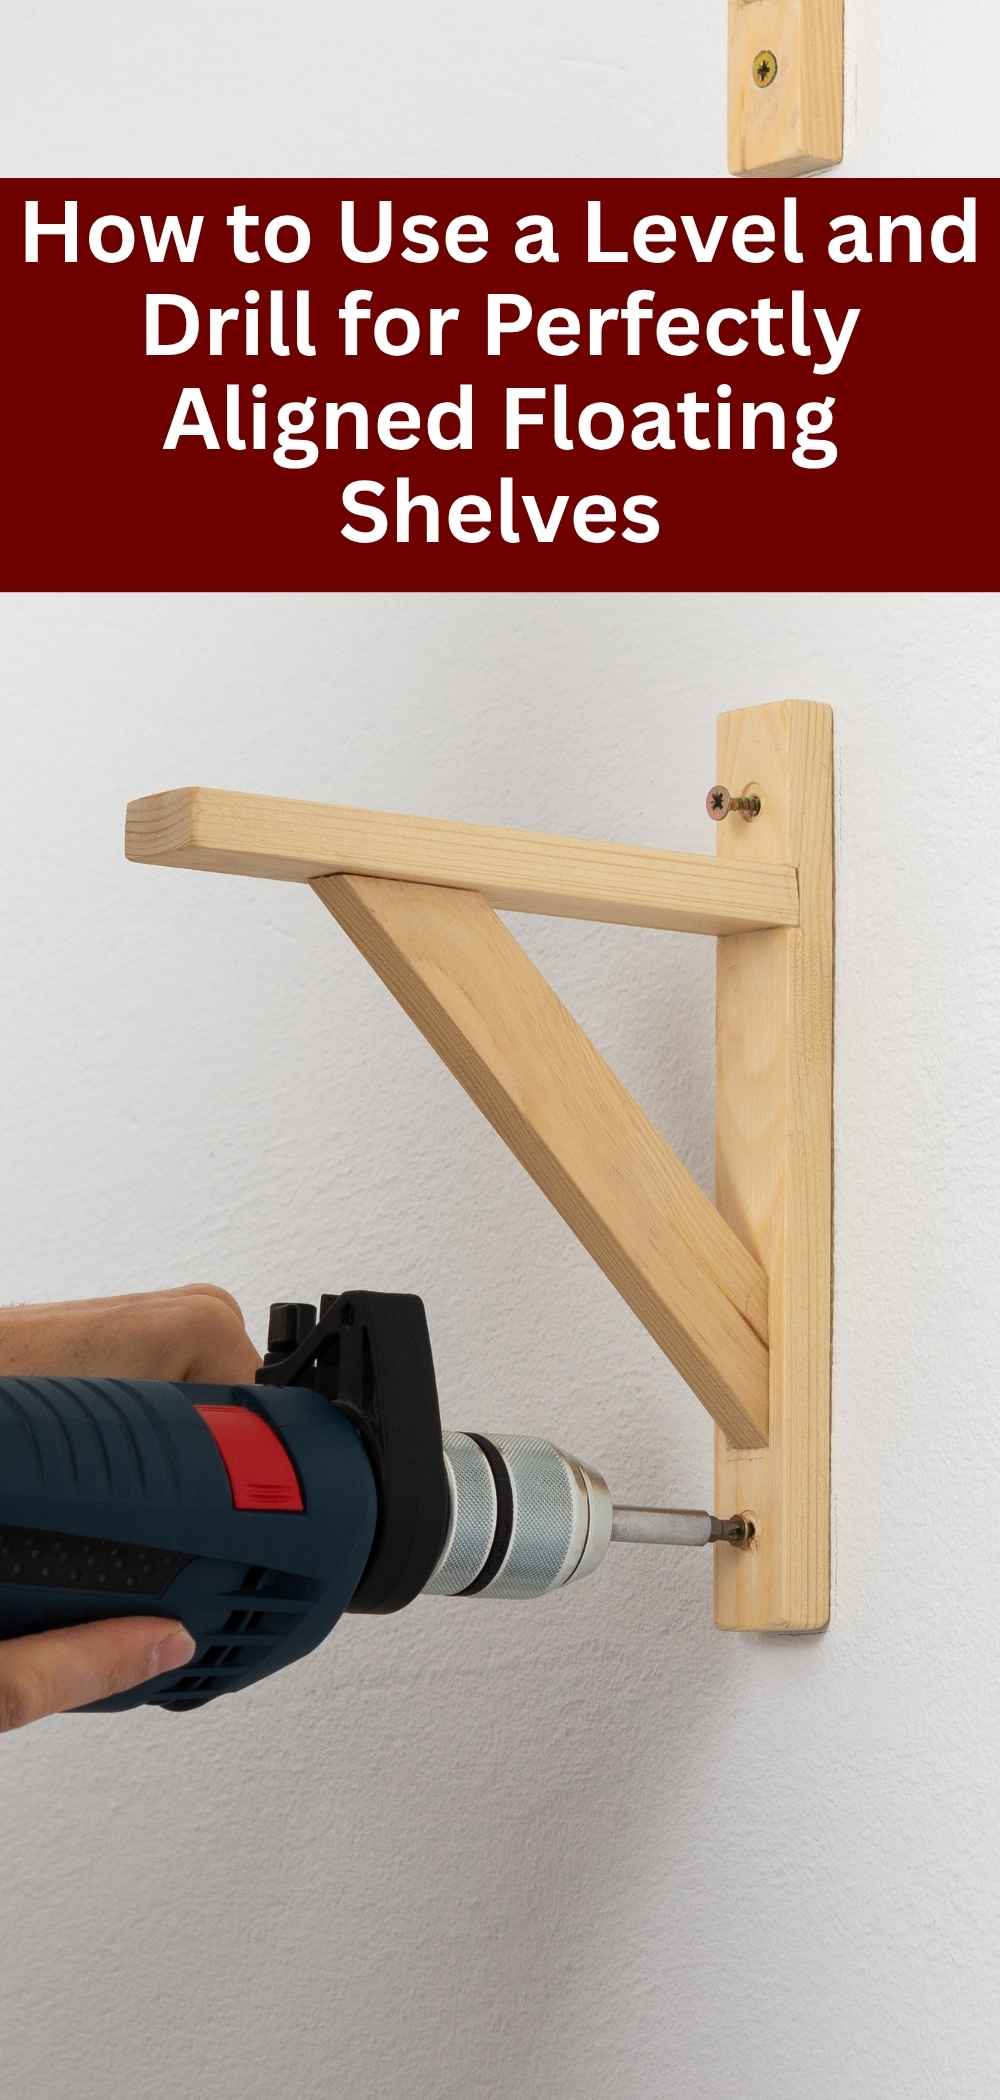
How to Use a Level and Drill for Perfectly Aligned Floating Shelves
Installing floating shelves is a fantastic way to add style and storage to your home, but achieving a perfectly aligned shelf display requires precision with a level and drill. Whether you’re mounting shelves on drywall, brick, or tile, using these tools correctly ensures a professional, polished look without uneven or wobbly results. This guide is ideal for renters and homeowners aiming for a flawless DIY wall decor setup. Below, we share 10 expert tips for using a level and drill to install floating shelves with perfect alignment, enhancing both functionality and modern aesthetics.
1. Choose the Right Level for Accurate Measurements
A bubble level is essential for ensuring your floating shelves are perfectly horizontal, creating a balanced shelf display. Opt for a 24-inch or longer level for wider shelves to check alignment across the entire length, or a torpedo level for smaller shelves in tight spaces. Digital levels are another option, offering precise readings for a professional DIY wall decor setup, especially in living rooms or kitchens.
Before drilling, place the level on the wall where the shelf will go, typically at eye level (57–60 inches from the floor), and adjust until the bubble centers. This confirms your drilling marks will result in a straight shelf. For brick or tile walls, ensure the level doesn’t wobble on uneven surfaces, using a flat board if needed for stability.
Test your level’s accuracy by flipping it 180 degrees and checking if the bubble aligns consistently. A reliable level is the foundation of a perfectly aligned floating shelf installation, preventing tilting and ensuring a sleek, modern look for your decor.
2. Mark Drilling Spots with a Shelf Template
Using a shelf template or the shelf’s mounting bracket as a guide ensures precise drilling for floating shelves. Place the template or bracket against the wall at your desired height, typically aligned with nearby furniture like a sofa or desk. Hold a bubble level on top to ensure it’s horizontal, then mark drilling spots with a pencil through the bracket holes for a consistent shelf display.
For tile or brick, apply painter’s tape over the marks to prevent drill slippage and protect the surface. On drywall, mark directly on the wall, ideally over studs for heavy shelves. Double-check marks with a tape measure to ensure even spacing, critical for wide shelves requiring multiple brackets. This precision creates a polished DIY wall decor look.
If your shelf doesn’t include a template, create one from cardboard, tracing the bracket holes. Accurate marking with a level ensures your floating shelves align perfectly, supporting decor like books or plants without tilting.
3. Locate Studs for Secure Drilling
For heavy-duty floating shelves, drilling into wall studs provides maximum strength, especially for loads over 20 pounds. Use a stud finder to locate studs in drywall, typically 16 inches apart, and mark their centers with a pencil. Hold a bubble level vertically to ensure your marks align with the stud’s edge, creating a stable base for your shelf display.
If studs aren’t available, plan to use toggle bolts or masonry anchors for brick or tile, but still use a level to keep marks aligned. For tile, ensure holes penetrate into the substrate (drywall or concrete) for a firm hold. This step is crucial for a secure DIY wall decor setup, preventing shelves from pulling out under weight.
Verify stud locations by tapping the wall for a solid sound or using a small pilot hole. Combining a stud finder with a level ensures your floating shelves are both secure and perfectly aligned, ideal for heavy decor like electronics or vases.
4. Use Painter’s Tape for Clean Drilling on Tile or Brick
When drilling into brick or tile for floating shelves, painter’s tape prevents surface damage and ensures drill accuracy. Place tape over your marked drilling spots, rechecking alignment with a bubble level to confirm the marks are level. The tape stabilizes the masonry bit, reducing slippage and the risk of cracking delicate tile surfaces.
Drill slowly through the tape using a masonry bit (e.g., 1/4 inch) on a low-speed setting (300–600 RPM), starting with a pilot hole for precision. This technique creates clean holes for anchors, ensuring a secure shelf display without damaging your brick or tile walls. Remove the tape gently after drilling to avoid lifting tile glaze or brick dust.
For drywall, tape is optional but can help mark spots clearly. Using painter’s tape with a level enhances the professionalism of your DIY wall decor, ensuring your floating shelves are aligned and your walls remain pristine.
5. Drill Pilot Holes for Precise Anchor Placement
Drilling a pilot hole with a smaller bit (e.g., 1/8 inch) guides your larger masonry or drywall bit, ensuring accurate holes for floating shelf anchors. Use a bubble level to confirm your marked spots are aligned, then drill a shallow pilot hole at each mark with light pressure. This prevents the drill from wandering, especially on hard surfaces like brick or tile, critical for a level shelf display.
For drywall, use a standard bit for pilot holes into studs or toggle bolt locations. On tile or brick, a masonry bit is essential, and drilling slowly prevents cracking. Once pilot holes are set, switch to the correct bit size for your anchors (e.g., 5/16 inch) and drill to the required depth, typically 1.5–2 inches.
This method ensures anchors fit snugly, supporting heavy-duty floating shelves for decor like books or kitchenware. Combining pilot holes with a level creates a precise, professional DIY wall decor setup, keeping your shelves straight and secure.
6. Select the Correct Drill Bit for Your Wall Type
Choosing the right drill bit is critical for installing floating shelves on different wall types. For drywall with studs, use a standard bit (e.g., 1/8 inch for pilot holes, 5/16 inch for anchors). For brick or tile, a carbide-tipped masonry bit is necessary to cut through hard surfaces without dulling. Match the bit size to your anchor for a snug fit, ensuring a stable shelf display.
Set your drill to hammer mode for brick or concrete, but use rotary mode for tile to avoid cracking. Check your bit’s condition before starting, as a dull bit can damage walls or create uneven holes. Use a bubble level to ensure marked spots are aligned before drilling, maintaining perfect shelf alignment.
Invest in quality bits from brands like Bosch or DeWalt for durability. The right drill bit paired with a level ensures clean, precise holes, creating a professional DIY wall decor look for your floating shelves on any surface.
7. Drill at the Right Speed and Pressure
Drilling at the correct speed and pressure prevents wall damage and ensures precise holes for floating shelves. For drywall, use a medium speed (800–1200 RPM) with light pressure to avoid tearing the paper surface. For brick or tile, set your hammer drill to a low speed (300–600 RPM) and apply steady, gentle pressure with a masonry bit to prevent cracking.
Keep the drill perpendicular to the wall, using a bubble level to check alignment as you mark and drill. For tile, pause periodically to cool the bit, reducing the risk of fractures. This controlled approach creates clean holes for anchors, ensuring a secure shelf display for decor like plants or heavy books.
If the drill vibrates excessively, reduce pressure or check the bit for wear. Proper speed and pressure, combined with a level, ensure your floating shelves are perfectly aligned and securely mounted, enhancing your DIY wall decor.
8. Secure Anchors and Brackets with Precision
After drilling, insert wall anchors (e.g., toggle bolts for drywall, sleeve anchors for brick/tile) into the holes, ensuring they’re flush with the wall. Use a bubble level to confirm brackets are level before securing with screws, tightening with a screwdriver or low-torque drill to avoid stripping. This ensures a stable shelf display for heavy-duty floating shelves holding items like electronics or kitchenware.
For tile, ensure screws penetrate the substrate for a firm hold; for brick, screws should grip anchors tightly. Check bracket alignment with a level after partial tightening, adjusting as needed. This precision prevents wobbly shelves, creating a professional DIY wall decor look in living rooms or kitchens.
Test each bracket for firmness before mounting the shelf, ensuring it can handle the intended load. Secure anchors and brackets are key to perfectly aligned floating shelves, delivering both safety and modern style.
9. Test Shelf Alignment Before Loading Decor
Before adding decor, test your floating shelves for alignment and stability to ensure a flawless shelf display. Place a bubble level on the mounted shelf to confirm it’s horizontal, adjusting brackets or screws if needed. Gently press down on the shelf to check for wobble, ensuring anchors are secure and capable of supporting the intended weight (e.g., 20–50 pounds).
If the shelf tilts, recheck anchor placement or add additional supports, especially for heavy-duty floating shelves. For brick or tile, ensure anchors are fully embedded in the solid material. This step prevents sagging under heavy loads like books or vases, maintaining a polished DIY wall decor setup.
Start with lightweight decor and gradually add heavier items, rechecking alignment with a level. Testing ensures your floating shelves are perfectly aligned and secure, creating a functional, modern aesthetic for your space.
10. Clean and Patch Holes for Future Adjustments
If you need to reposition or remove your floating shelves, patching drilled holes properly is essential, especially for renters. For drywall, fill holes with spackling paste, smooth with a putty knife, and sand lightly after drying. For brick, use masonry caulk; for tile, apply color-matched grout or caulk, ensuring a seamless finish to maintain your brick or tile walls.
Use a bubble level during installation to minimize the need for repositioning, reducing hole count. When patching, apply material sparingly and wipe excess with a damp cloth to avoid visible patches. This ensures your walls return to their original state, protecting your security deposit or home’s integrity.
Document patching for landlord verification, if needed. Clean patching enhances the flexibility of your DIY wall decor, allowing you to adjust your shelf display without lasting damage, keeping your space modern and pristine.
Frequently Asked Questions (FAQs)
What type of level is best for installing floating shelves?
A bubble level (24-inch for wide shelves, torpedo for small) ensures accurate alignment. Digital levels offer precision for a professional shelf display in DIY wall decor.
How do I use a level to ensure shelves are straight?
Place a bubble level on the shelf or bracket during marking and after mounting. Adjust until the bubble centers, ensuring a level floating shelf installation.
What drill bits are needed for floating shelves?
Use standard bits for drywall (1/8–5/16 inch) and carbide-tipped masonry bits for brick/tile. Match bit size to anchors for a secure shelf display.
Can I drill into tile without cracking it for shelves?
Yes, apply painter’s tape, use a masonry bit, and drill at low speed (300–600 RPM) with light pressure. A level ensures alignment for your floating shelves.
How do I patch holes after removing floating shelves?
Use spackling paste for drywall, masonry caulk for brick, or matched grout/caulk for tile. Smooth carefully to restore walls for damage-free DIY wall decor.
How do I avoid uneven shelves when drilling?
Use a bubble level to mark and check holes, drill pilot holes for precision, and verify bracket alignment before tightening. This ensures a straight shelf display.
Conclusion
Using a level and drill correctly is the key to installing floating shelves with perfect alignment, creating a stunning and functional shelf display for any room. These 10 expert tips—from selecting the right bubble level to patching holes—ensure a precise, secure installation that enhances your DIY wall decor without compromising your walls. Whether you’re mounting shelves in a kitchen, living room, or bathroom, these techniques deliver a professional, modern look. Start your project today, save this guide for future reference, or explore more home decor tips to craft a stylish, perfectly aligned space that’s uniquely yours!